Every campaign has nine tabs running across the top of the screen. Each one scopes a different aspect of the campaign — from the core details and creative assets through to the full change log. This page explains what lives in each tab and when to use it.Documentation Index
Fetch the complete documentation index at: https://platform195.mintlify.app/llms.txt
Use this file to discover all available pages before exploring further.
Overview
The default view when you open a campaign. This is the main form — edit the campaign name, account, dates, budget, currency, sales probability, tags, collaborators, and notes. Click in the top right to persist any edits. The line items table sits below the form. From here you can search and filter line items, switch between Table, Board, and Timeline views, and click to add new ones.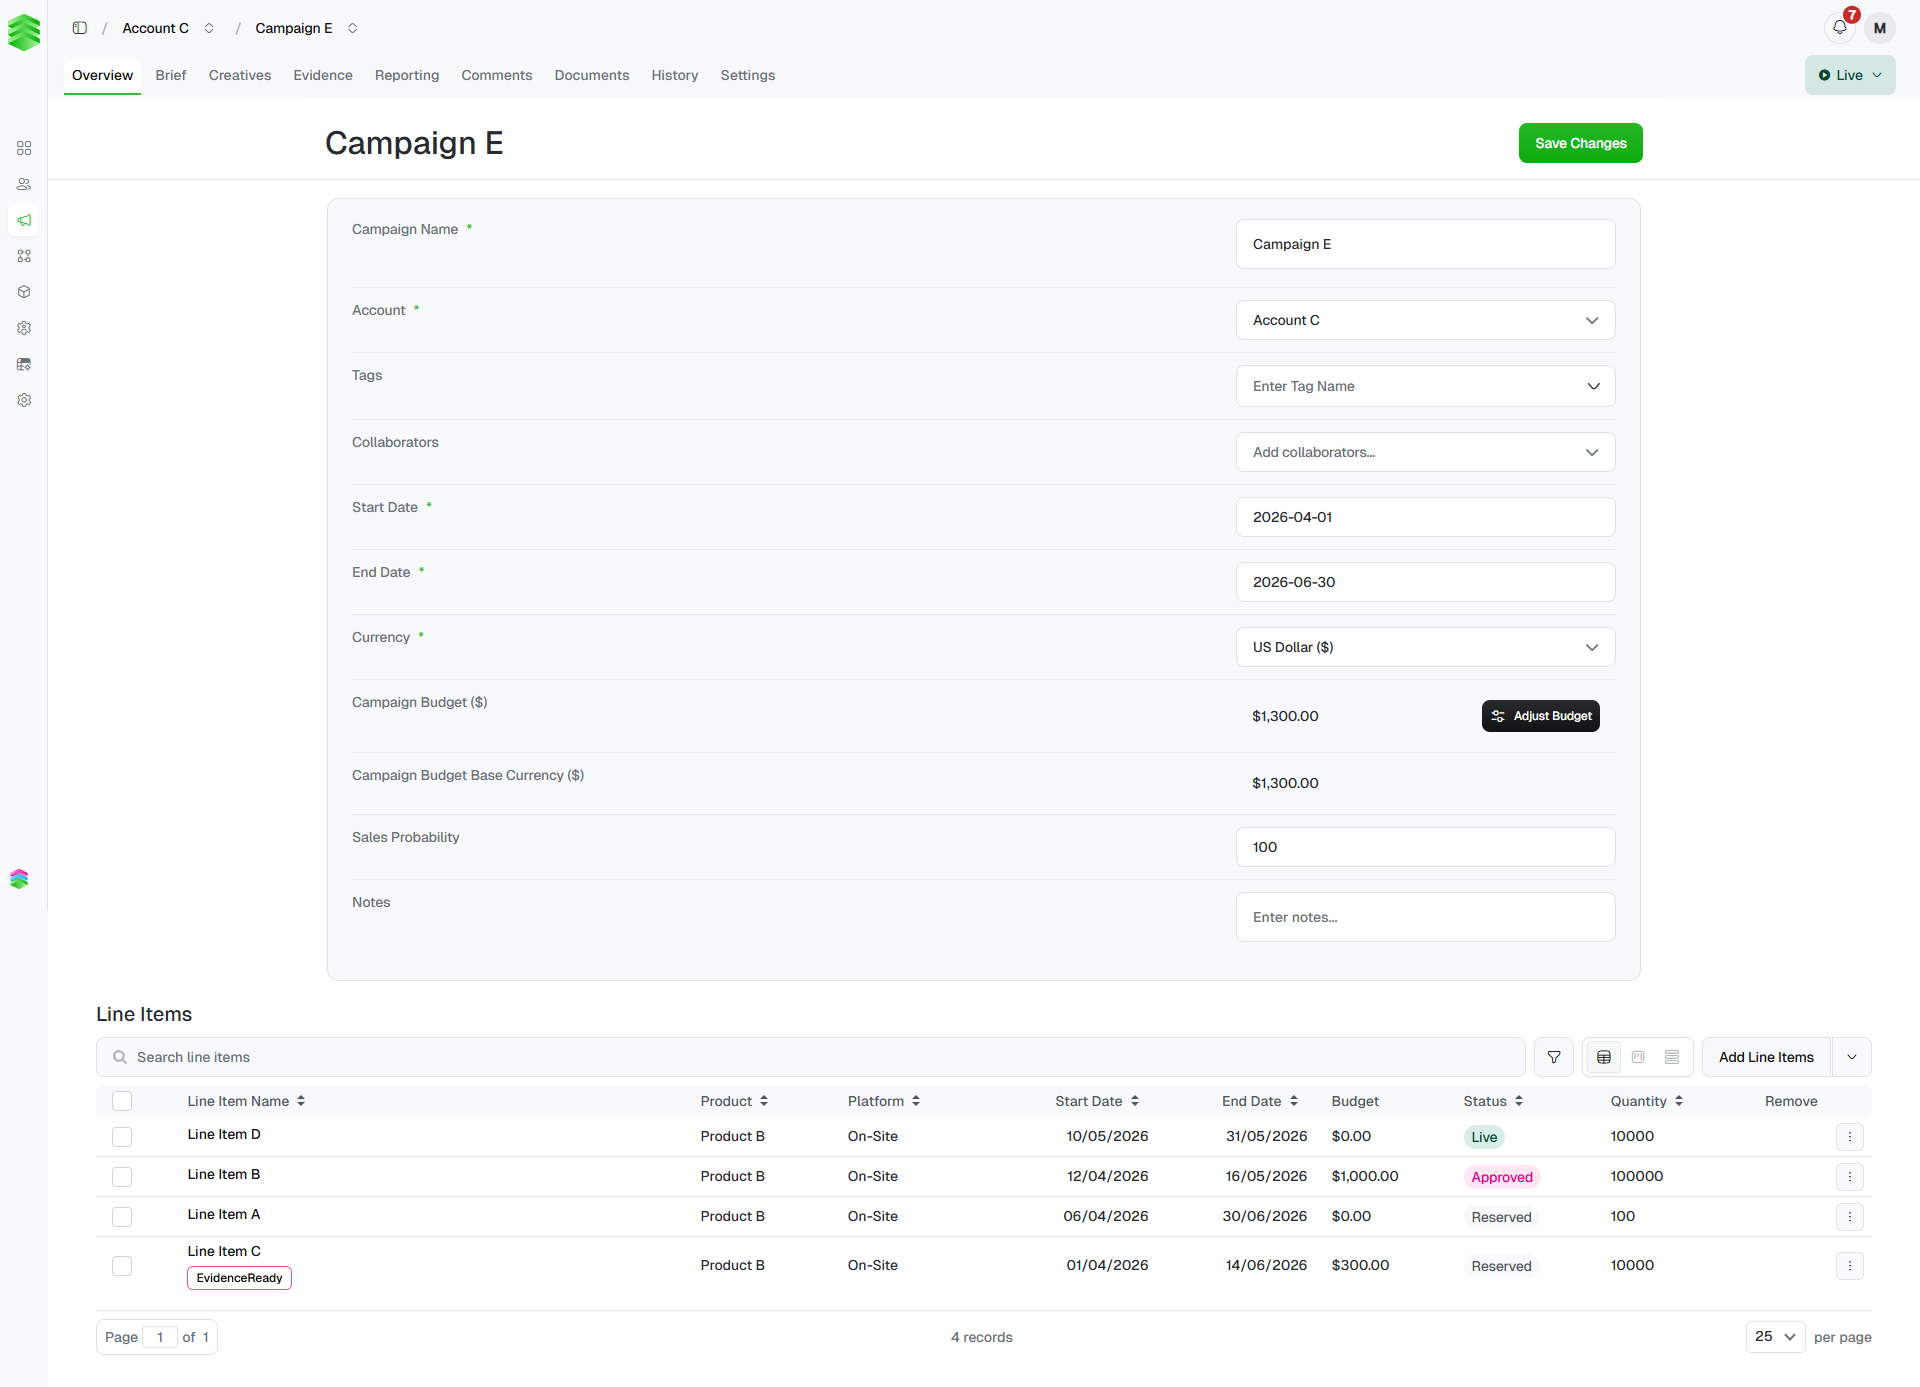
Currency cannot be changed after creation. If you need to correct it, delete the campaign and start again. See Creating a campaign.
Brief
The Brief tab holds campaign context that sits alongside — but separate from — the core campaign details on the Overview tab.Campaign brief fields
| Field | Notes |
|---|---|
| Targeting Requirements | Free-text description of the targeting criteria for this campaign. |
| Campaign URL | The primary destination URL for the campaign. |
| Star Rating (hotel only) | The star rating of the property being advertised. |
| Location (hotel only) | The location of the property. |
| Special Instructions | Any additional notes for the delivery or creative team. |
Assets
The Assets section is where you store raw client-supplied files and brand assets before they are built into creatives — logos, hero images, brand guidelines, or any other files the client has provided. Click to open the New Asset modal. Each asset has an Asset Name (required), optional Notes on how to use it, an option to link the asset to one or more line items, one or more URLs, and a file upload area. Image files are automatically optimised for quality and file size on upload. A separate Line Items Assets section at the bottom of the page groups any assets that have been linked to specific line items.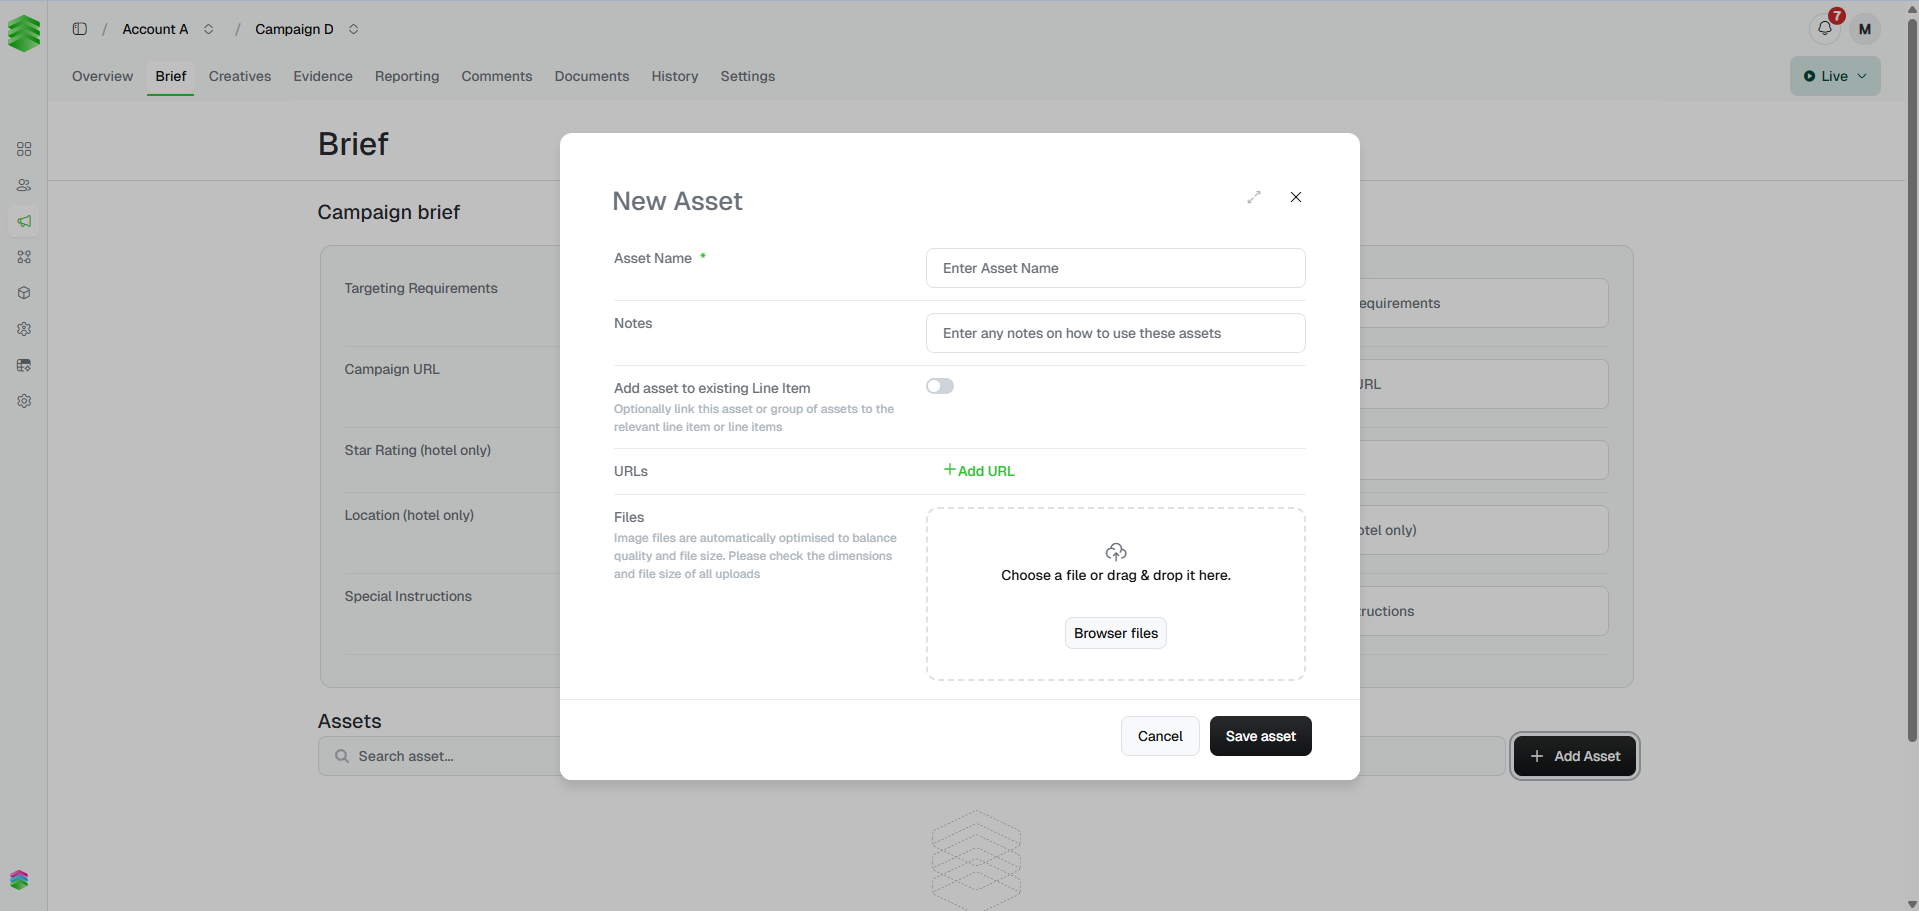
Creatives
A campaign-level roll-up of every creative across all line items. Each line item appears as a collapsible section showing its creatives with thumbnail previews and status. Click on any section header to jump to that line item directly, or click the external link icon on a creative card to go straight to the creative detail page. Use in the top right to generate a shareable preview link for the whole campaign.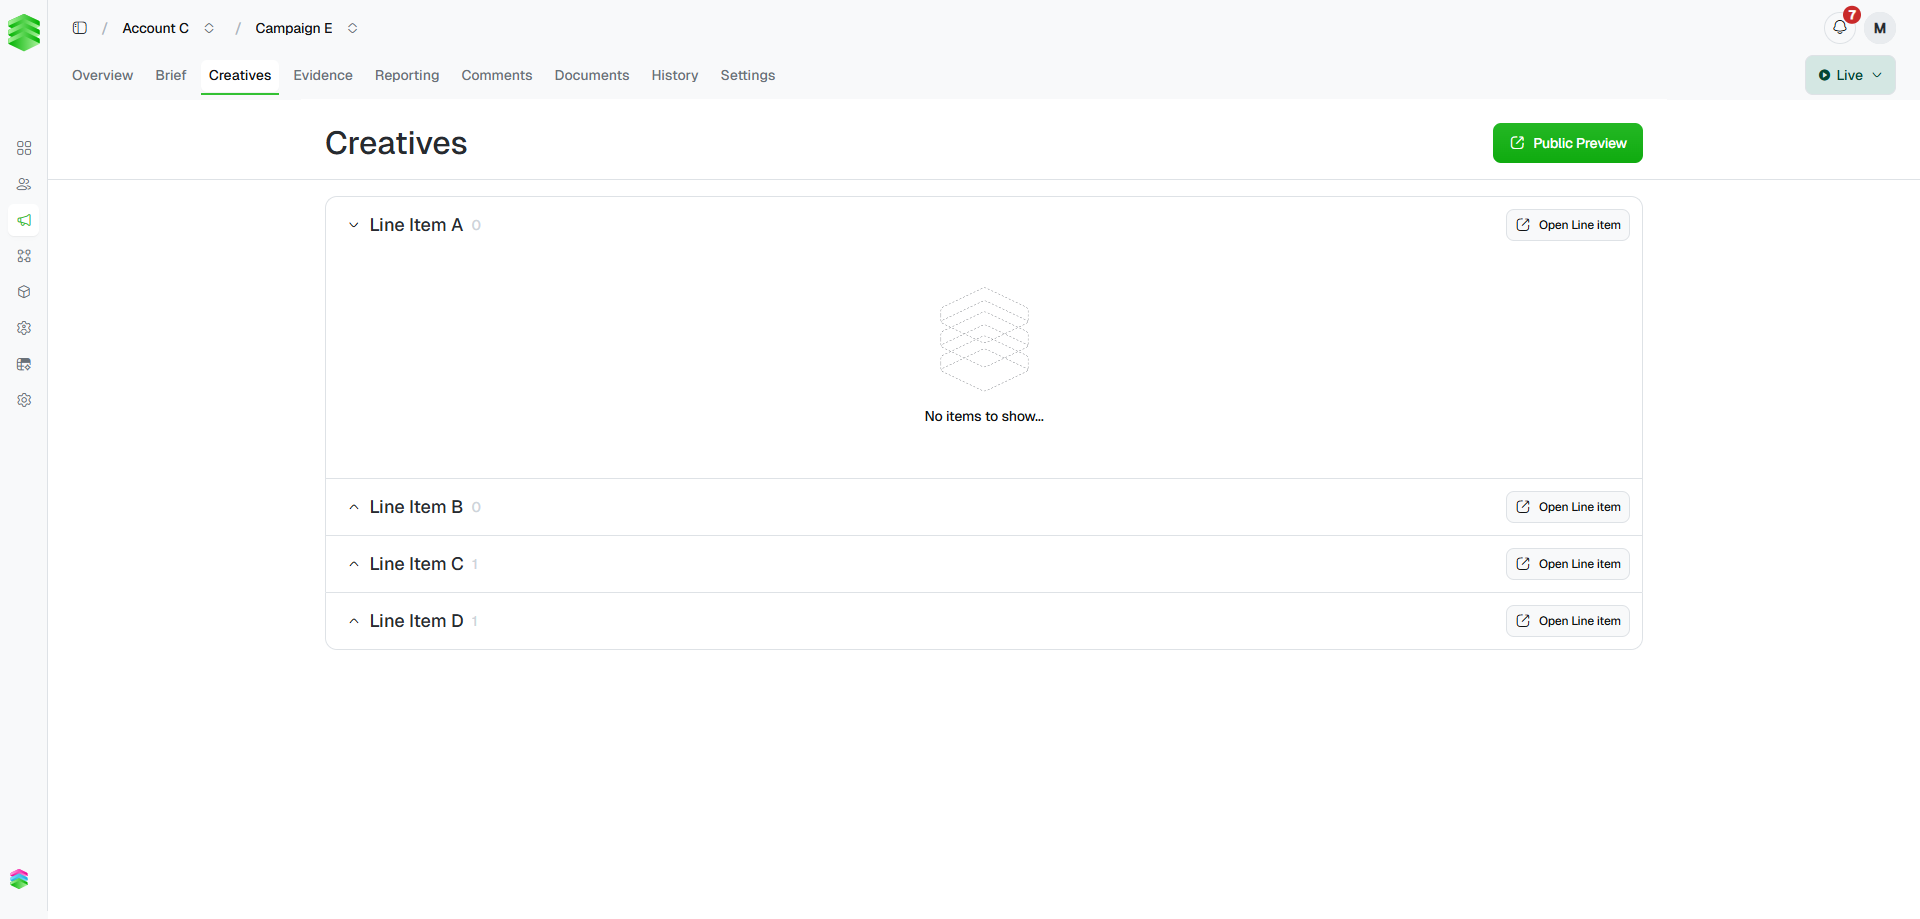
This view is read-only. To edit a creative, click through to its detail page. See Building creatives.
Evidence
The Evidence tab is where you store proof that a campaign is live or has completed — typically screenshots of ads appearing in situ. Evidence is grouped by line item. Click to upload a screenshot for a specific line item. Use the search bar to find evidence already uploaded. Evidence is visible at both campaign and line item level.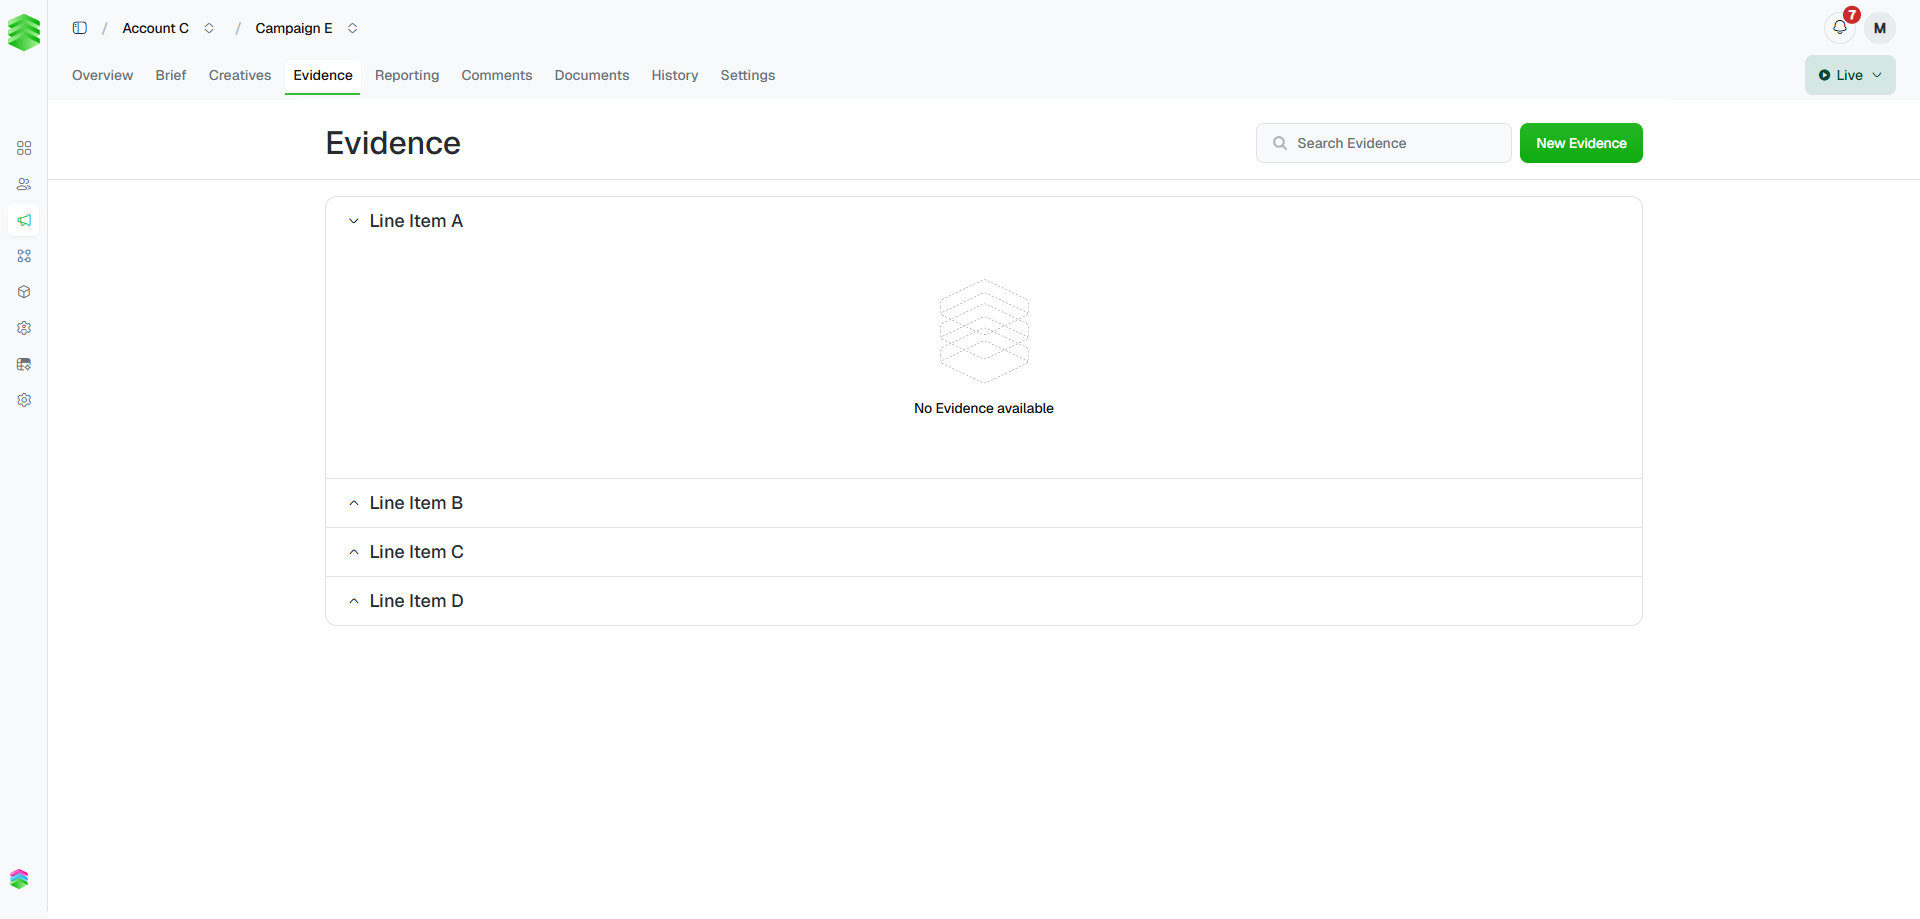
Reporting
Shows the campaign’s performance dashboard — impressions, clicks, CTR, and revenue as headline KPIs, with a line item breakdown table and time-series charts below. For line items delivered via Uplift Ads or Uplift Ads+, this data is populated automatically. See Tracking performance for more detail on automated vs manual reporting..png)
Comments
A shared comment thread for the campaign. Use @mentions to notify specific teammates or your Platform 195 representative directly. Comments are visible to everyone with access to the campaign and are a good place to flag questions, blockers, or approvals.Documents
Stores generated and uploaded documents against the campaign — post-campaign reports, insertion orders, proposals, and any other files. Click to add a file from your computer, or use the dropdown arrow next to it to generate a document from a template. Each document shows its name, type, status, who created it, and the date. Click the ⋯ menu on any row to edit, send, download, or delete it.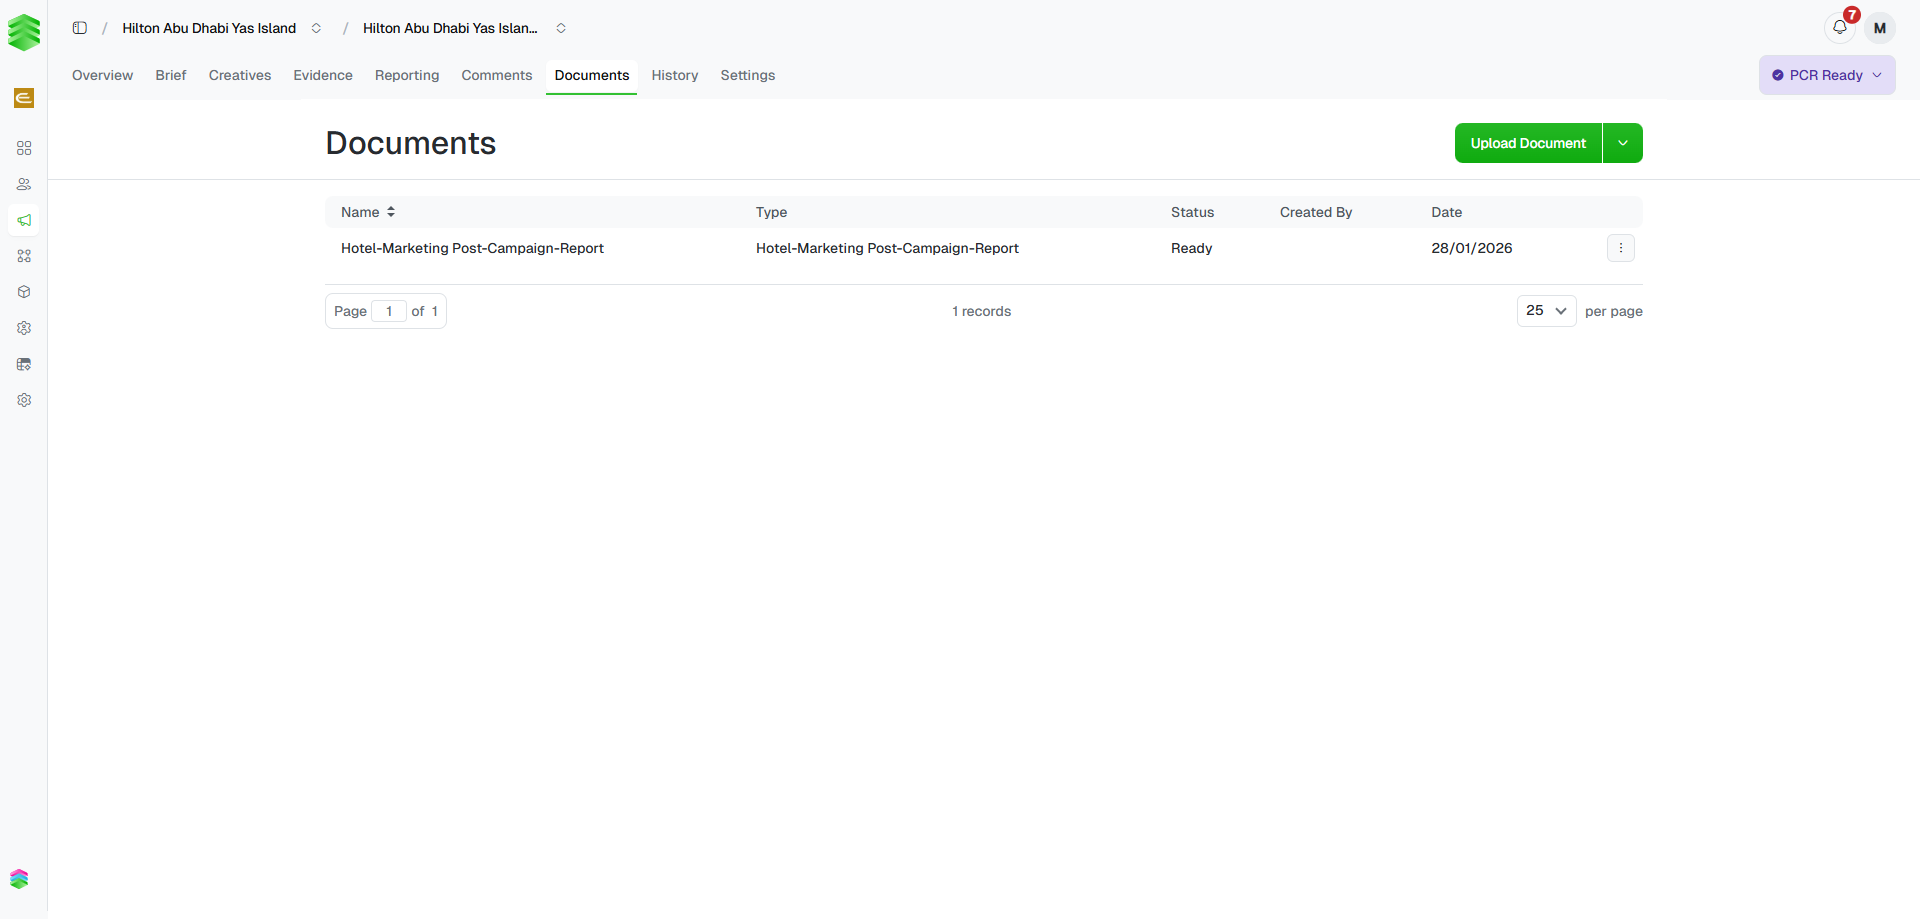
Post-campaign reports are generated from a Google Slides template configured for your workspace. After clicking , wait a few seconds and refresh. If you don’t see the document type you need, contact support@uplifthub.io.
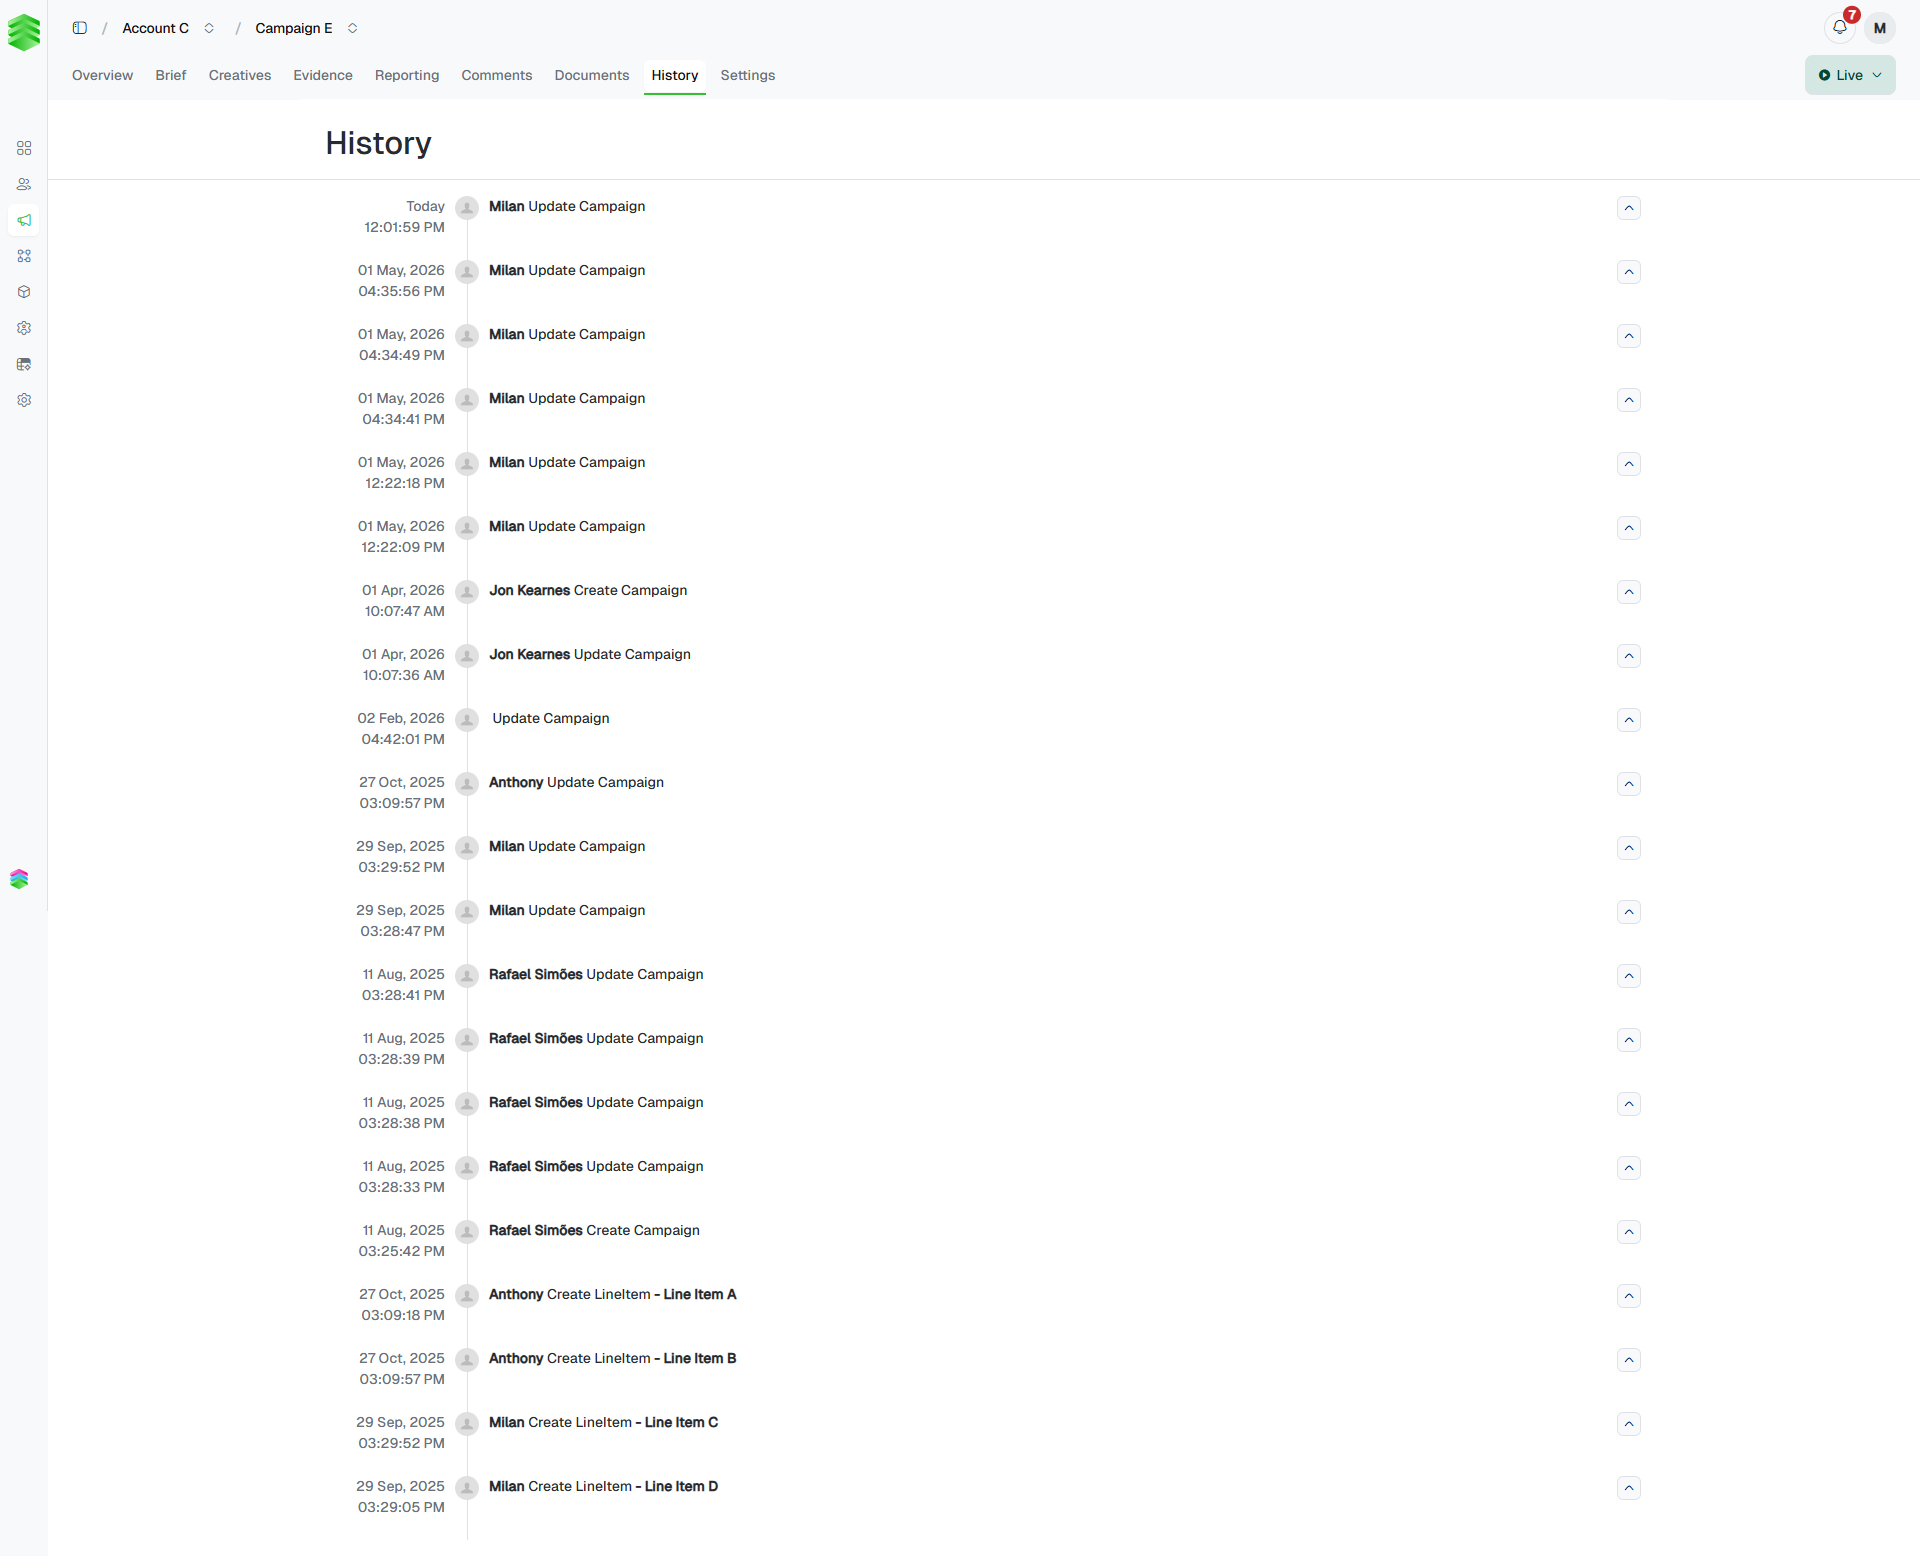
History
A full, chronological log of every change made to this campaign and its line items — who did what and when. Each entry shows the timestamp, user, and action (e.g. Update Campaign, Create LineItem). Click the chevron on any entry to expand it and see the specific fields that changed.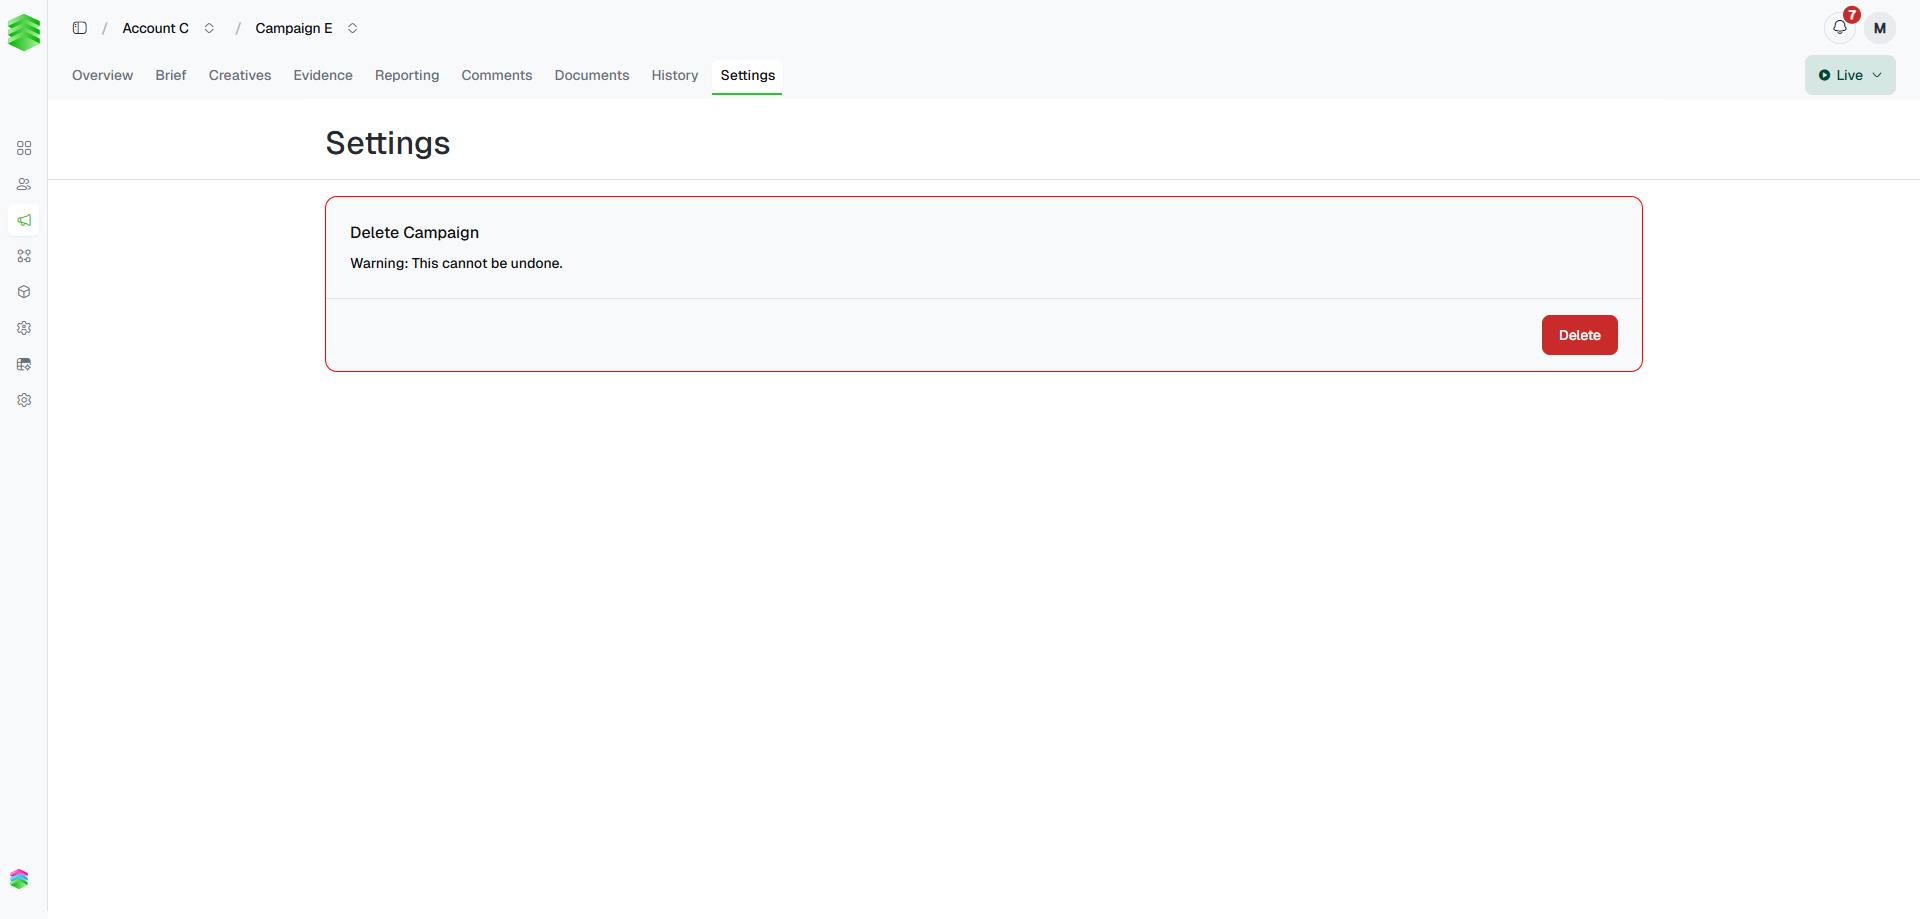
Settings
Contains the Delete Campaign action. Deleting a campaign is permanent and removes all associated line items and creatives.